Macbook Prohibitory Symbol… How to fix without losing data?
If you’ve ever encountered a circle with a line slashing through it during the startup of your Mac, it’s not exactly a signal for a smooth ride ahead. This iconic symbol is like a red flag, indicating a variety of functional or operational issues within your Mac. Unfortunately, this isn’t the kind of symbol you want to see, as it usually spells trouble for your Mac device.
The prohibitory symbol is a graphic representation that something has gone wrong with your Mac while it is starting up. Typically, this sign signifies that the startup disk you’ve chosen contains a Mac operating system that isn’t compatible with your specific Mac model. In simpler terms, your Mac has managed to detect an operating system on the selected startup disk, but it’s unable to boot from this operating system due to incompatibility. This usually leads to a freeze-up post-login, with the dreaded circle with a line through it appearing on your Mac screen, signaling a compatibility mismatch.
This symbol can show up during startup or while the computer is running. In either case, it’s a warning that something is preventing your Mac from booting up correctly.
Why does a “Zero with a Line Through it” error occur?
The reasons for this symbol appearing could range from software issues, to hardware failures, or even a corrupted or damaged macOS installation.
- Corrupted macOS Installation: The macOS system files might be damaged or corrupted, preventing the operating system from starting up properly.
- Software Incompatibility: An incompatible or improperly installed software update or application could be causing the issue.
- Disk Errors: Errors on the startup disk, such as a failing hard drive or file system corruption, can prevent macOS from booting.
- Hardware Issues: Problems with hardware components, such as a failing hard drive, memory, or logic board, can also cause the symbol to appear.
- Incorrect File Permissions: Incorrect file permissions on system files can cause macOS to be unable to access the necessary files for startup.
Here are some steps to resolve the issue:
- Safe Mode: Restart your Mac and hold down the Shift key while it’s booting up. This will start your Mac in Safe Mode, which can help you identify and potentially fix the problem.
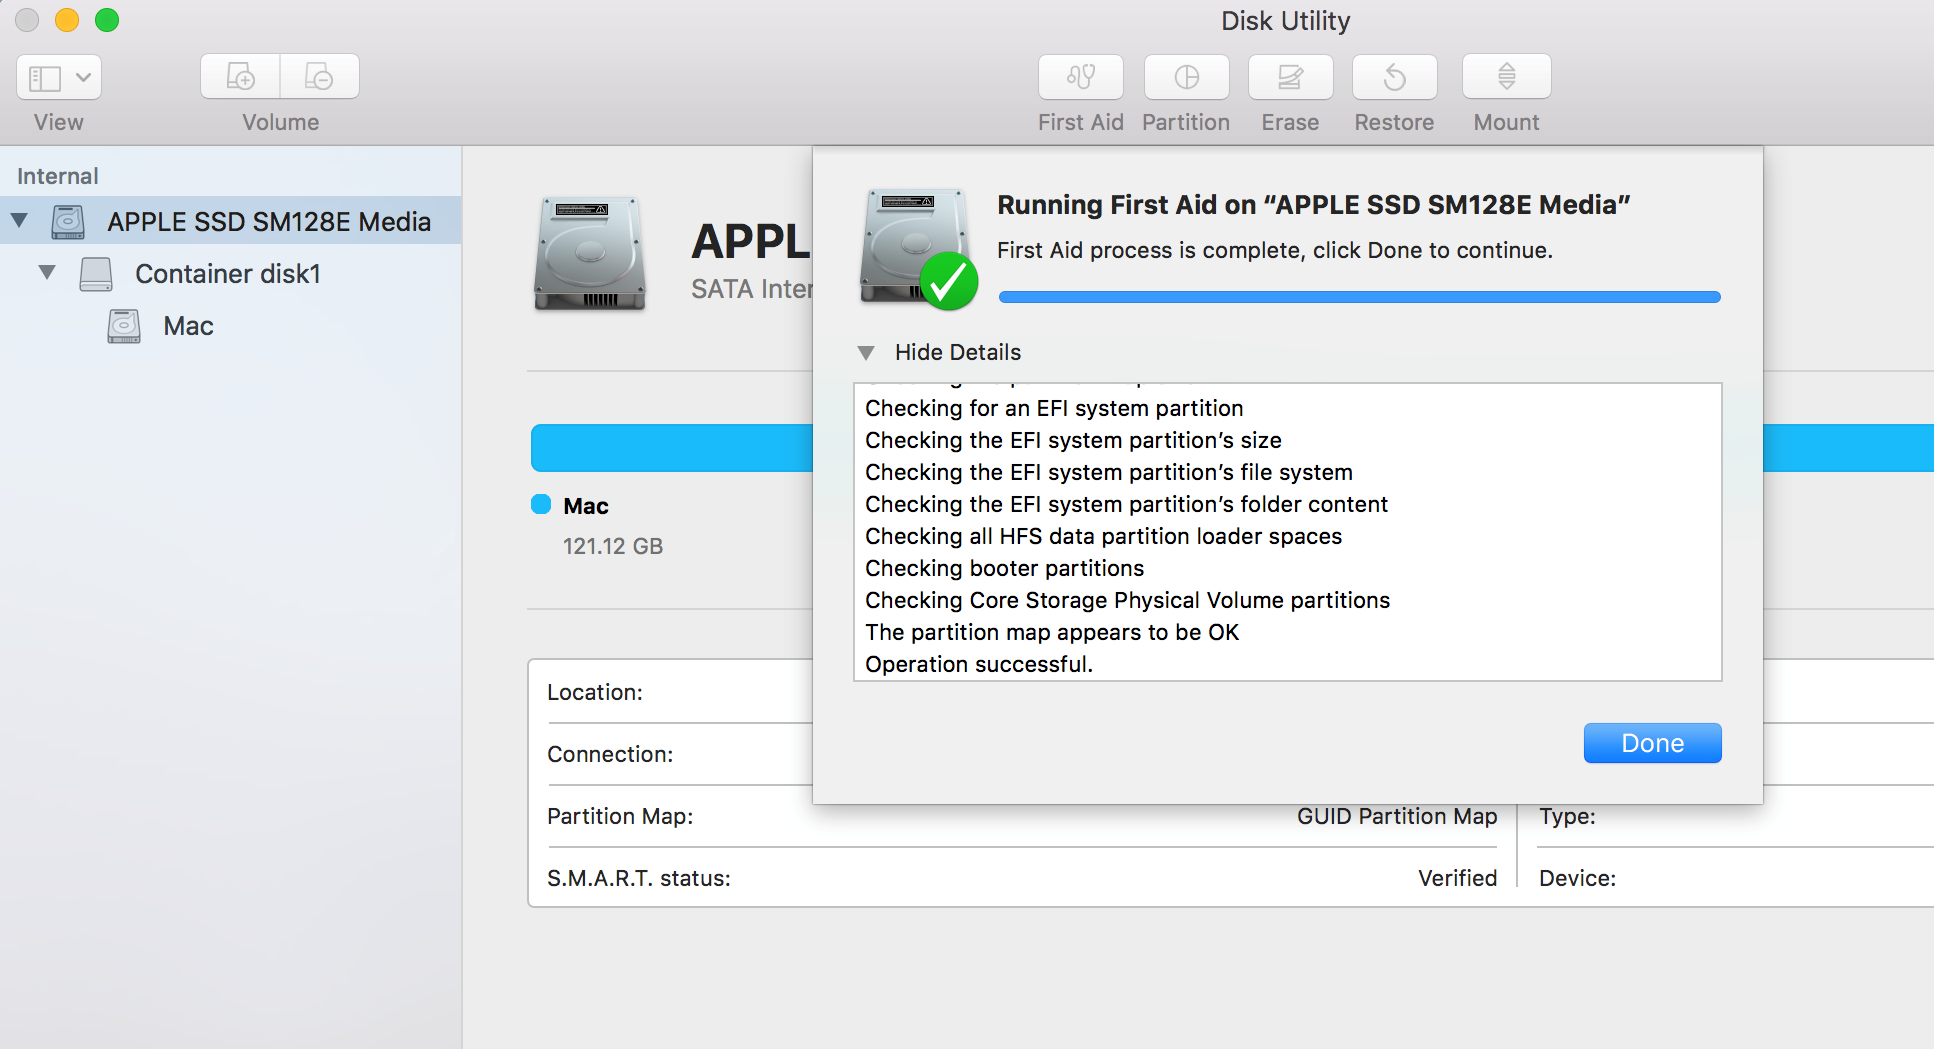
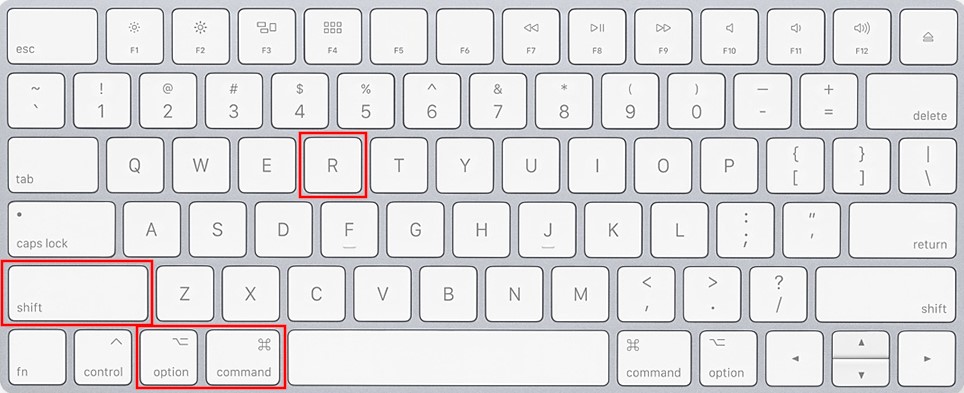
- Disk Utility: Restart your Mac and hold down Command + R to enter Recovery Mode. From there, you can open Disk Utility and run First Aid on your startup disk to check for and fix any disk errors.
- Reinstall macOS: If Disk Utility finds errors that it cannot fix, you might need to reinstall macOS. You can do this from Recovery Mode by selecting “Reinstall macOS” from the menu.
- Check Hardware: If none of the above steps work, the issue might be hardware-related. Check for any loose connections, and consider taking your Mac to an Apple Store or authorized repair center for diagnosis.
- Reset SMC and NVRAM: Resetting the System Management Controller (SMC) and Non-Volatile Random-Access Memory (NVRAM) can sometimes resolve startup issues. Instructions for how to do this can be found on Apple’s support website.
Run First Aid in Disk Utility to Fix Start Disk
If you’re seeing the dreaded circle with a slash through it on your Mac screen at startup, it could be due to corruption within the Macintosh HD. One potential remedy is to run First Aid in Disk Utility, which can help repair the startup disk and restore your Mac to its normal state.
In general, you can just open Disk Utility from the Utilities folder of your Applications folder. However, if your Mac doesn’t start up all the way, or you want to repair the disk your Mac starts up from, open Disk Utility from macOS Recovery:
- Determine whether you’re using a Mac with Apple silicon, then follow the appropriate steps:
- Apple silicon M1: Turn on your Mac and continue to press and hold the power button until you see the startup options window. Click the gear icon labeled Options, then click Continue.
- Intel processor: Depending on your Mac model, press & hold until the Apple logo pops up.
- Command (⌘) + R
- Command (⌘) + R + Option
- Command (⌘) + R + Option + Shift
You may be asked to select a user you know the password for. Select the user, then click Next and enter their administrator password
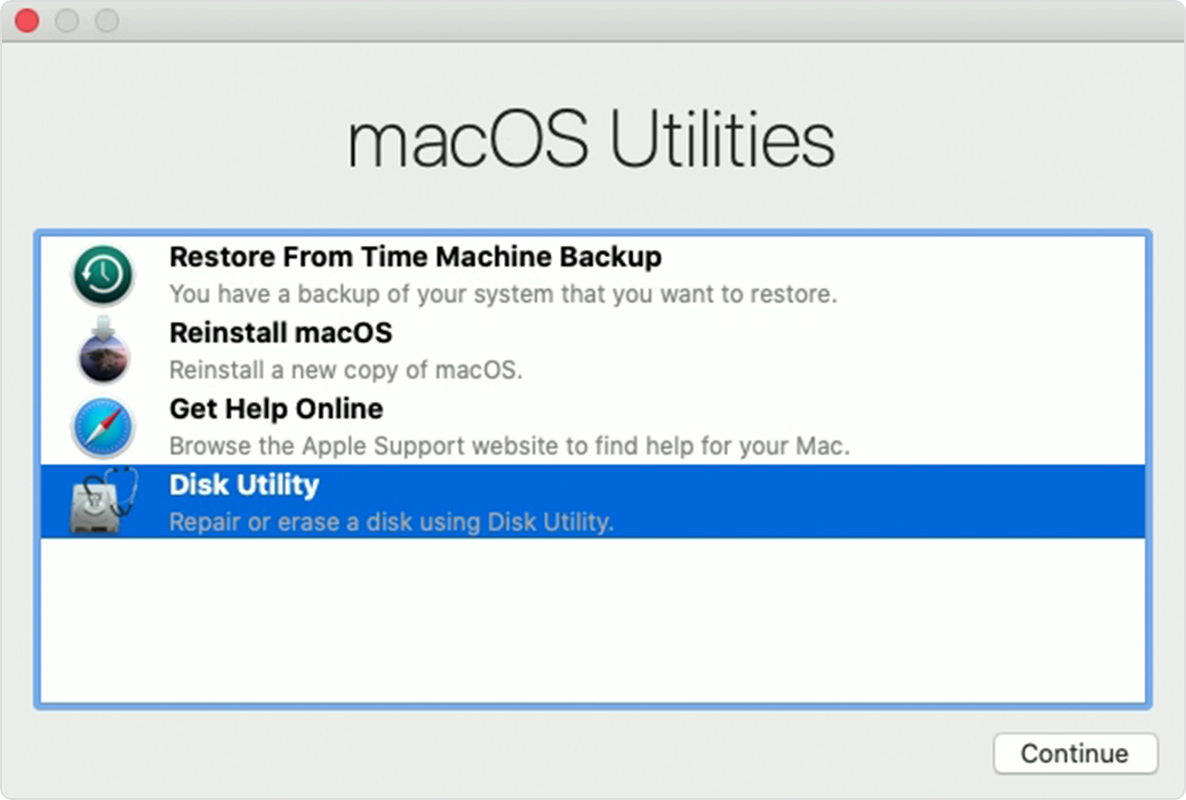
From the utilities window in macOS Recovery, select Disk Utility and click Continue
In general, you can just open Disk Utility from the Utilities folder of your Applications folder. However, if your Mac doesn’t start up all the way, or you want to repair the disk your Mac starts up from, open Disk Utility from macOS Recovery:
Select your disk in Disk Utility
View > Show All Devices (if available) from the menu bar or toolbar in Disk Utility.
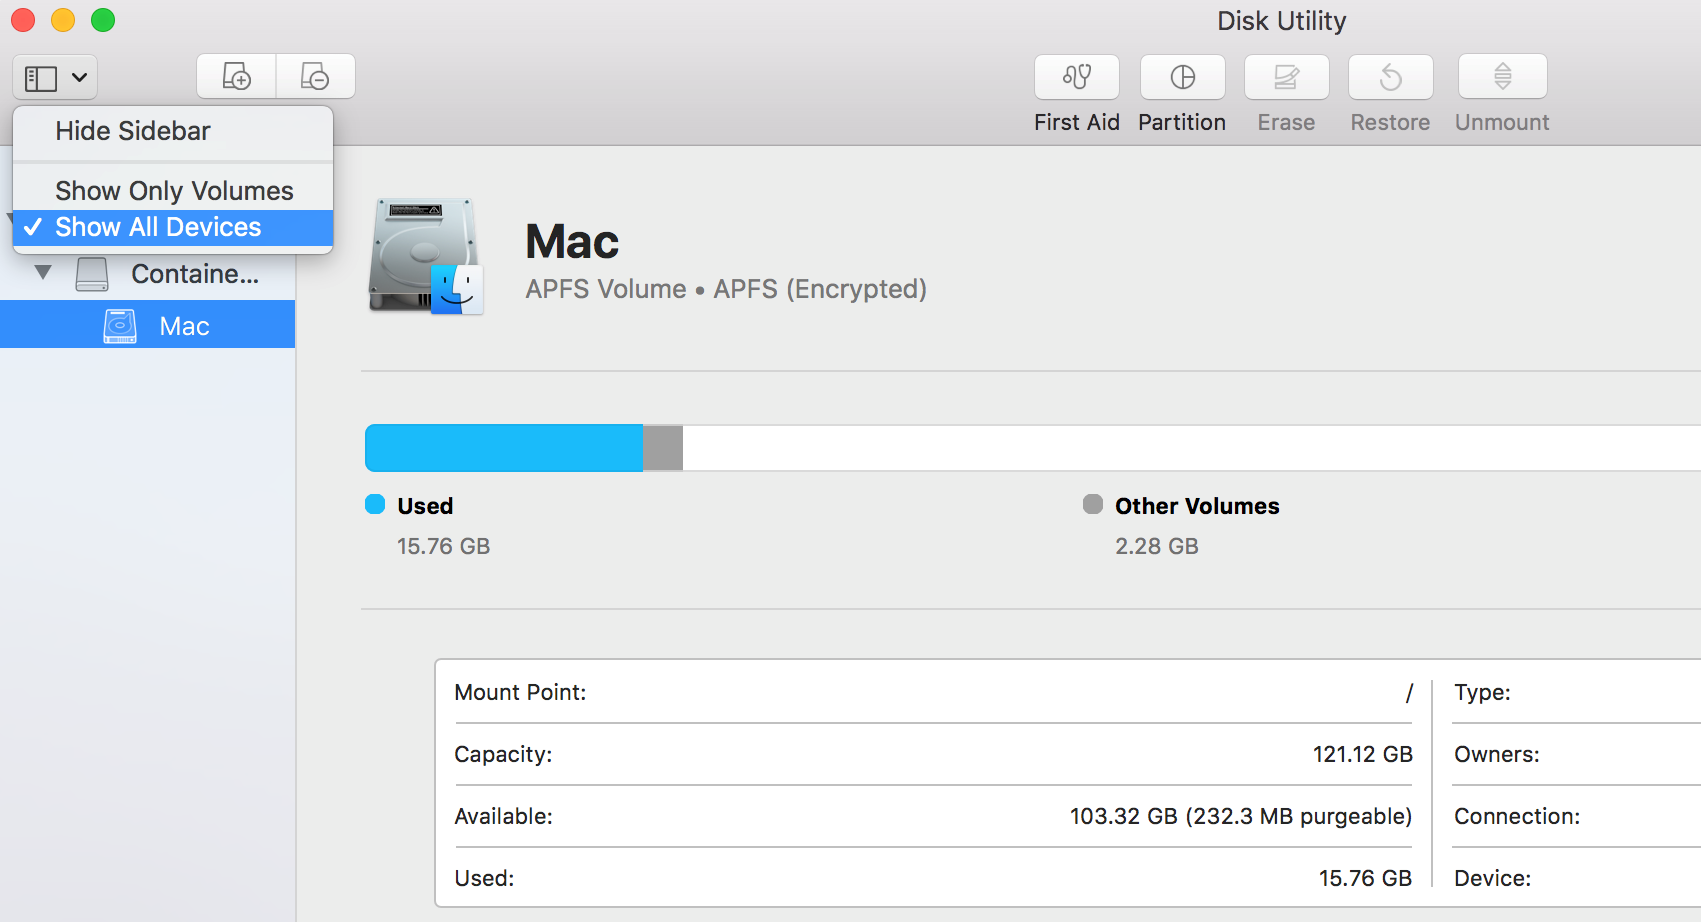
The sidebar in Disk Utility should now show each available disk or other storage device, beginning with your startup disk. And beneath each disk you should see any containers and volumes on that disk.
Repair volumes, then containers, then disks
When using Disk Utility to repair issues with your disk on a Mac, it’s generally recommended to repair volumes, then containers, and finally disks in that specific order. This is because of the hierarchical structure of the file system and storage on modern macOS systems, which are built upon APFS (Apple File System) for newer versions of macOS and HFS+ (Hierarchical File System Plus) for older versions.
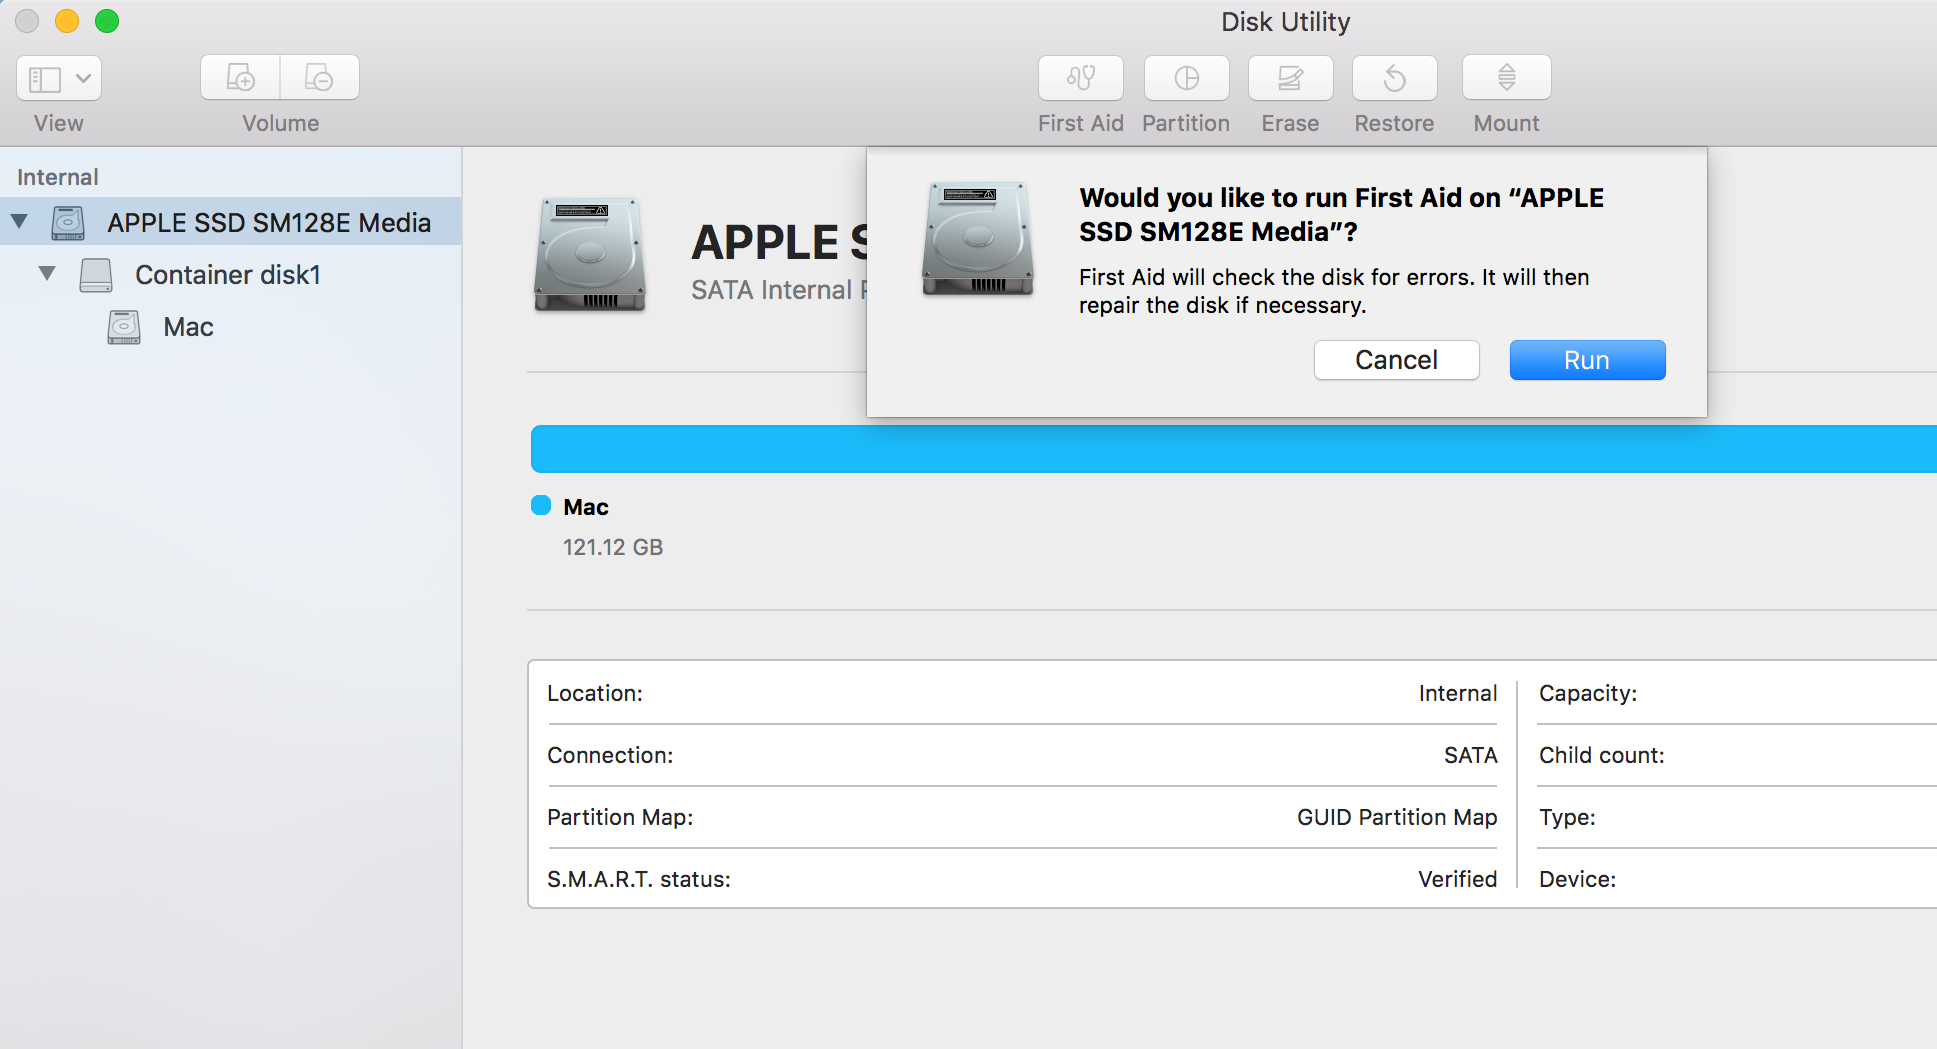
In this example, the startup disk (APPLE SSD SM128E Media) has one container (Container disk1) and one volume (Mac).
- Repair Volumes: The “volume” typically refers to a partition on the disk where you have your data stored. In Disk Utility, this would be the section where you see your individual disks and the volumes (partitions) on them. Repairing volumes typically involves checking and repairing the file system structure and metadata on each individual volume. This ensures that any issues specific to a particular volume (like directory structure corruption or file system errors) are addressed.
- Repair Containers: APFS (Apple File System) introduced the concept of containers, which can contain one or more volumes. Repairing containers checks and repairs the overall structure and integrity of the container, including its volumes. If there are issues with how volumes are organized or how the container itself is structured, repairing containers will address those issues.
- Repair Disks: Finally, repairing disks focuses on the physical disk itself. This includes checking and repairing the partition map and other physical structures on the disk. If there are issues with the disk’s partition map or other physical structures, repairing disks will address those issues.
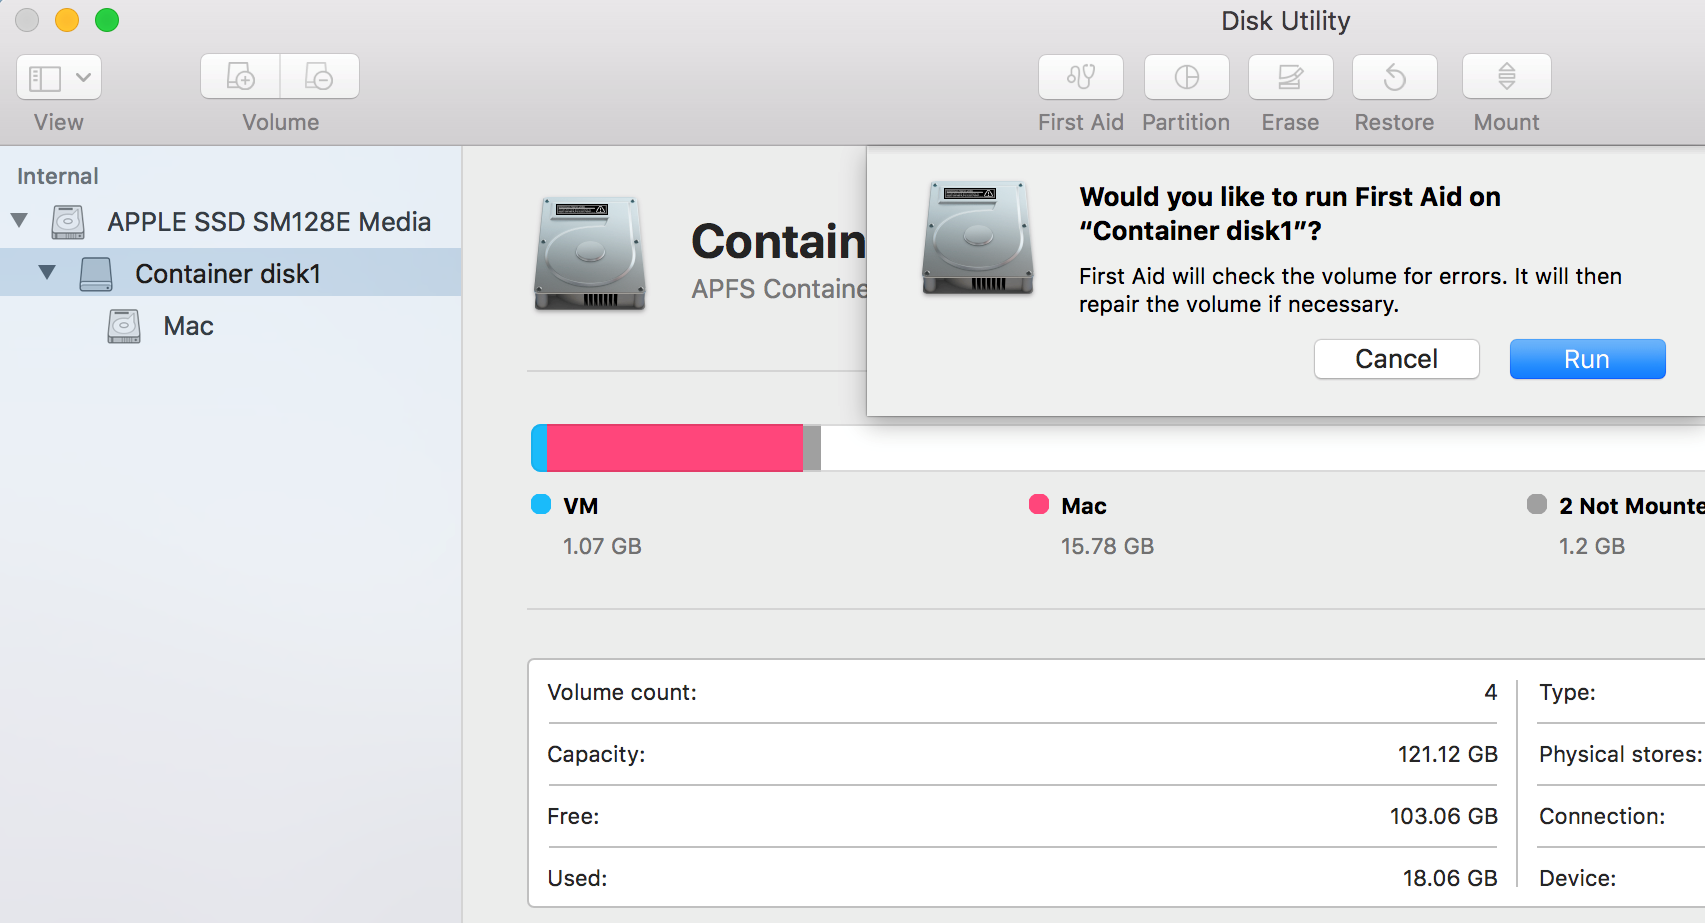
For each disk you want to repair, begin by choosing the last volume listed on that disk, then proceed to click the “First Aid” button
To initiate a check for errors on the selected volume, click the “Run” button.
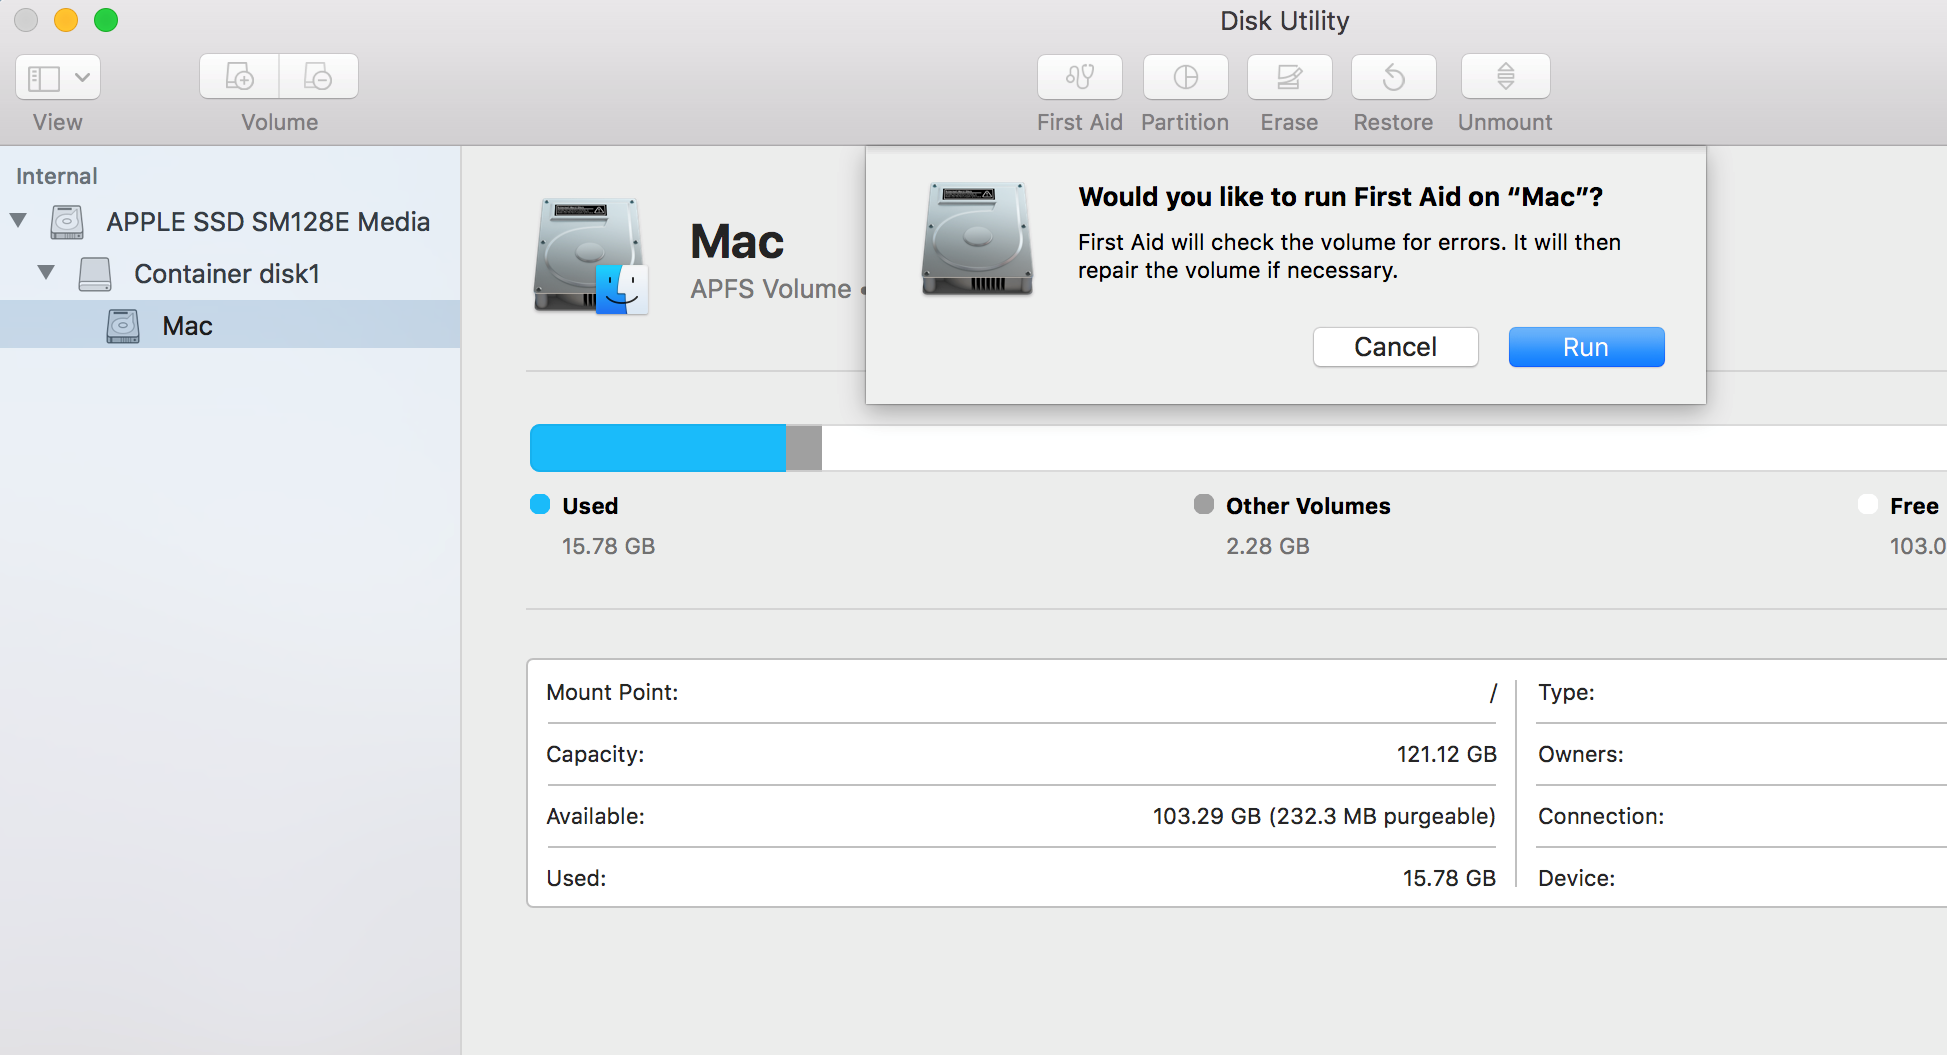
- If there is no “Run” button available, opt for the “Repair Disk” button instead.
- In the event that the button is dimmed and unresponsive, skip this step for the selected disk, container, or volume.
- If prompted for a password to unlock the disk, input your administrator password.
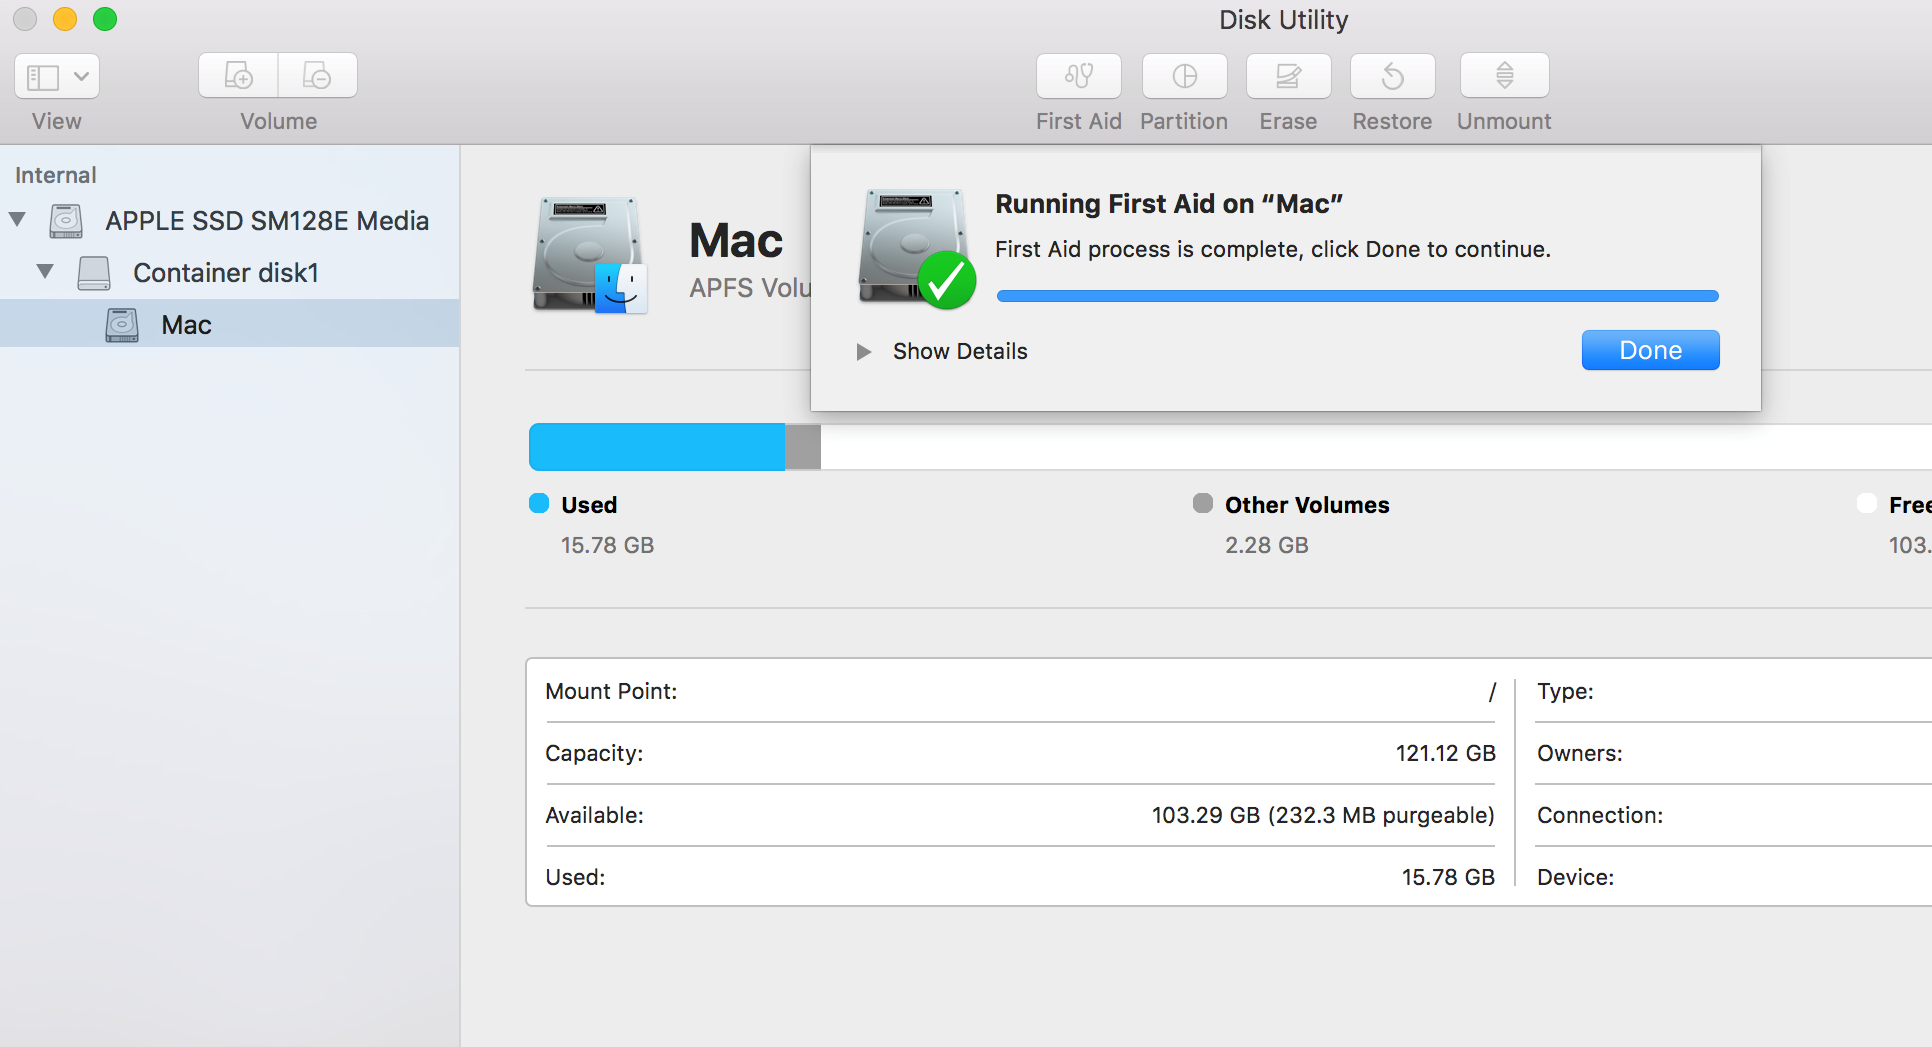
Upon completion of Disk Utility’s check on the volume, proceed to select the next item above it in the sidebar and rerun First Aid. Continue this process, moving up the list, and running First Aid on each volume, then each container, and ultimately the disk itself.
